
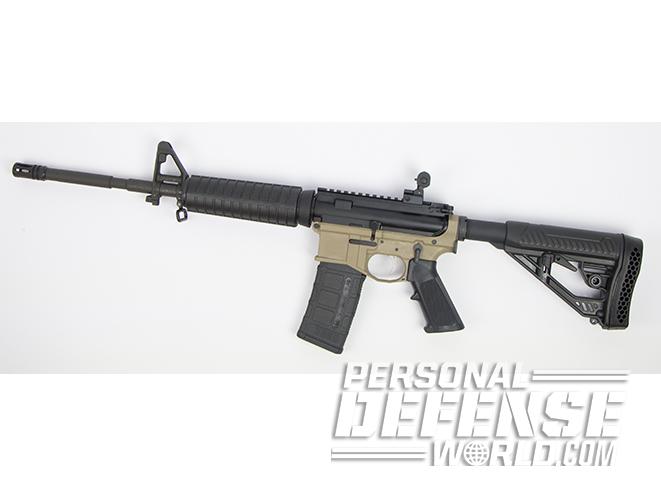
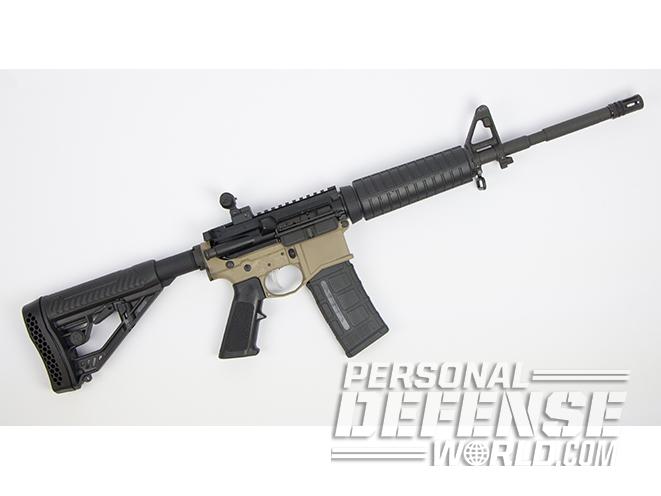
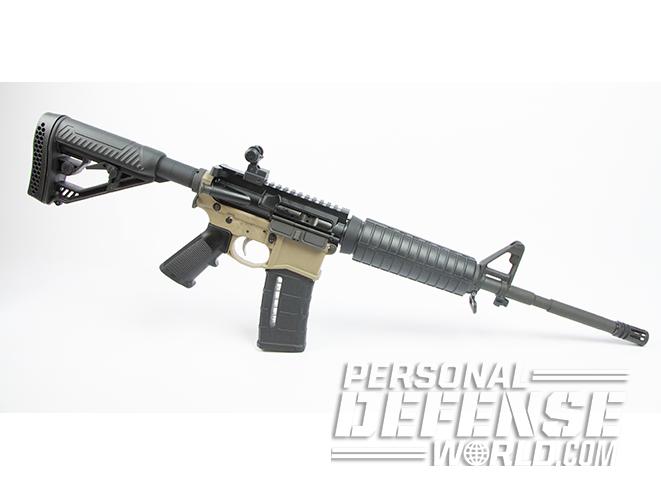
An AR build is likely one of the most fun things you can do without being on the range. From the ground up, you can select all of the parts to make the rifle unique and truly your own. In the first part of this series, I showed you how easy it can be to turn a so-called 80-percent lower into a functioning lower receiver. In this section I’ll demonstrate how to transform that finished lower into a functioning firearm. If you do not want to machine your own lower, you can also purchase a stripped lower through a firearms dealer and build it out using this guide.
1.) Set The Vise Block
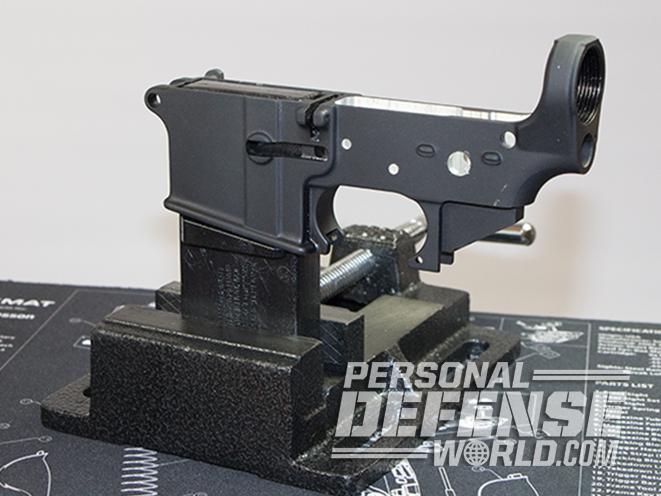
You can assemble a lower without the use of a vise, but it will definitely make your life easier. For the AR-15, a block is typically rectangular and matches the external dimensions of a magazine. Tightly secure the block in the vise and slip the lower on top of it using the magazine well.
Advertisement — Continue Reading Below
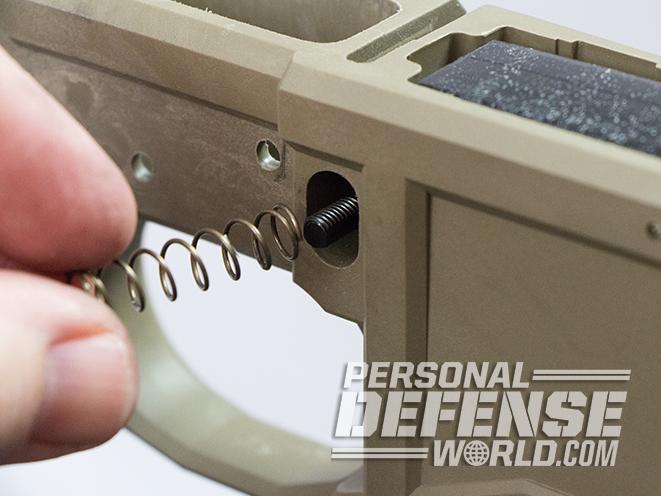
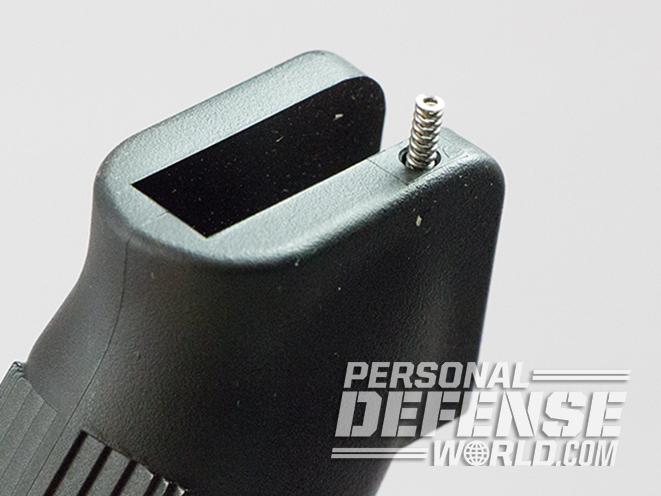
2.) Install The Mag Catch
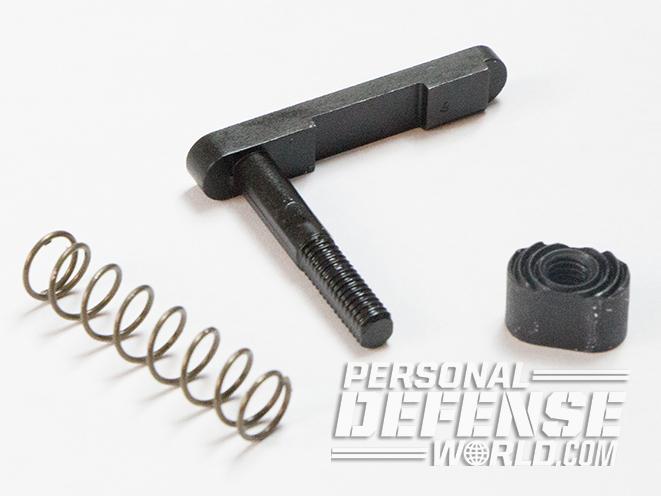
In your lower parts kit, you should have a magazine catch, a magazine release button and a magazine catch spring. Slide the magazine catch into the left side of the receiver. From the right side of the receiver, feed the magazine catch spring onto the magazine catch. Thread the magazine release button onto the magazine catch. Be sure to have the textured part of the magazine catch facing outward.
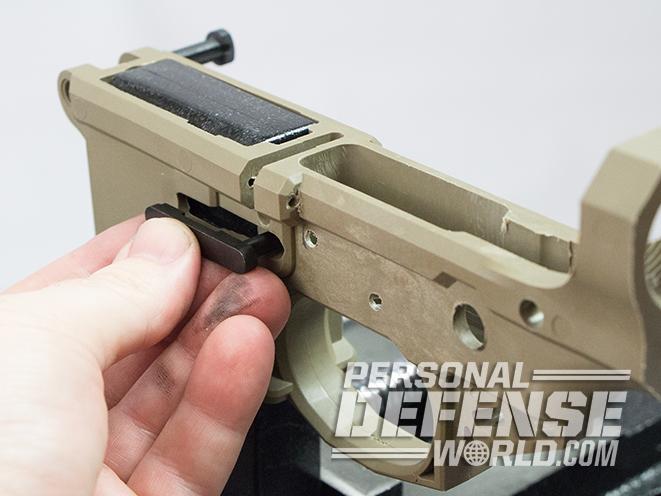
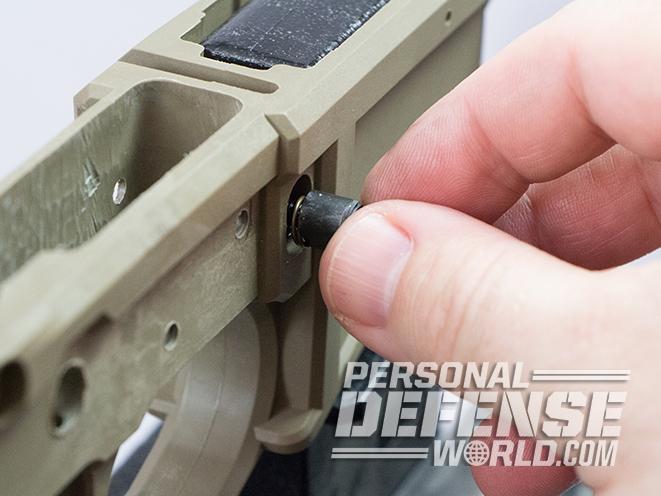
Once the magazine release button is threaded onto the magazine catch, take a punch and press it into the receiver. This will cause the magazine catch to protrude from the left side of the receiver. Turn the magazine catch clockwise, which will screw it into the magazine release button. After several turns, release the magazine release button and see how far it protrudes from the side of the receiver. You want the face of the button to be flush with the bumps around it on the receiver. If needed, press the button in and make adjustments to the depth by turning the magazine catch.
Advertisement — Continue Reading Below
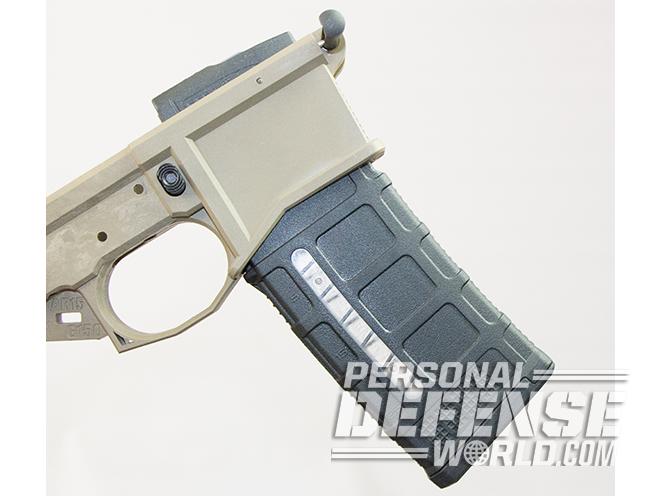
When you have the button at the proper depth, press it in and remove the lower from the block. Test out a few magazines in the lower to ensure each locks into place and then drops free. With some polymer lowers, you may need to do a small amount of sanding inside the magazine well to ensure all magazines will drop free.
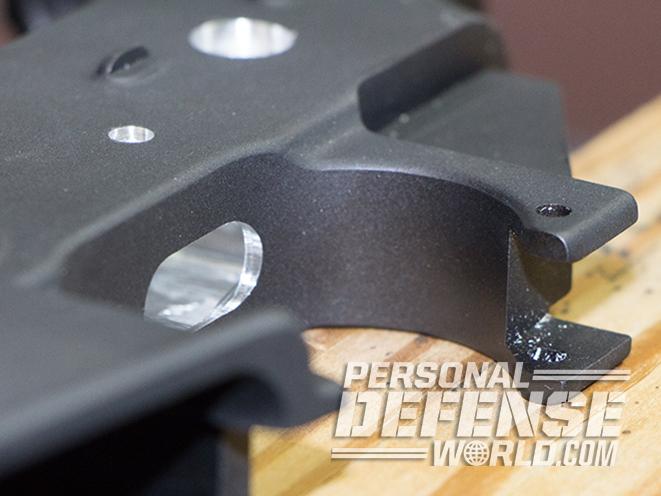
3.) Add The Triggerguard
This step applies only if you are using the flat triggerguard that is included with most lower parts kits. If you are using another company’s extended triggerguard, or a triggerguard that is integral with the pistol grip, follow the instructions included with those products. They can vary significantly from this step. The lower I machined in the first part of this series had an integral triggerguard, so this step was not needed for me.
Advertisement — Continue Reading Below
To install the guard, you will need the triggerguard and triggerguard roll pin from the lower parts kit. If you are using an Anderson lower parts kit, these will be in the small black bag. The triggerguard will have a detent pin under spring pressure. Press this in and slip it into the front pin holes in the trigger area. Lay the receiver on a small piece of wood so that the rear “ears” are supported. You will be driving a pin through them, so it is possible to break one if they are not fully supported.
Align the rear part of the triggerguard between the ears. Take the roll pin and lightly tap it into the hole in the top ear. You are not trying to drive it into the receiver—you’re just getting it started. Then, with the proper roll pin punch from the Obsidian punch set, drive the pin through the top ear, triggerguard and bottom ear. Check to ensure the roll pin is flush on both sides of the receiver.
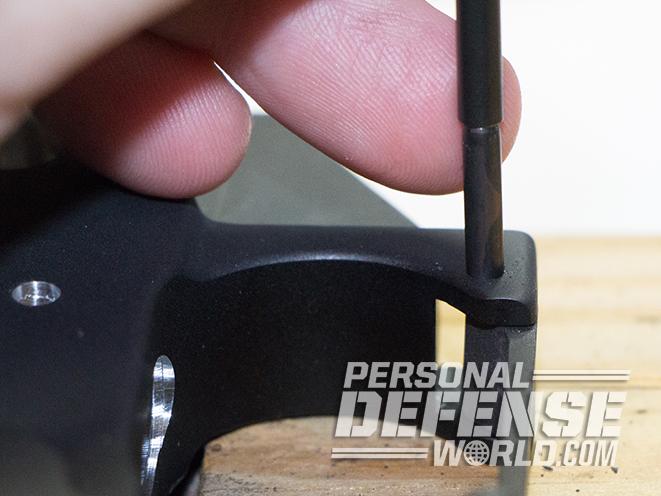
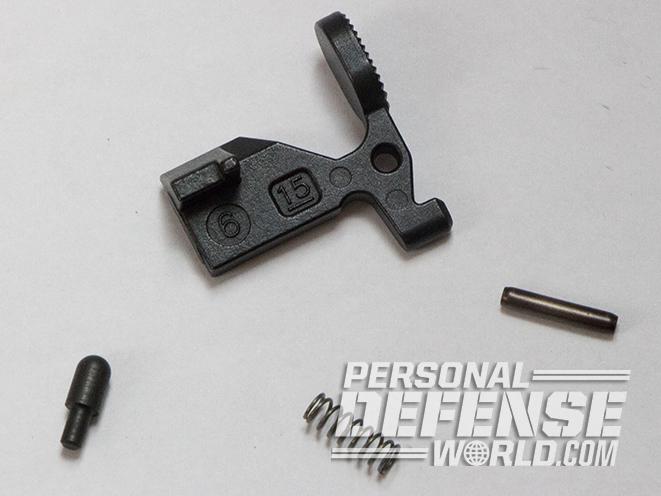
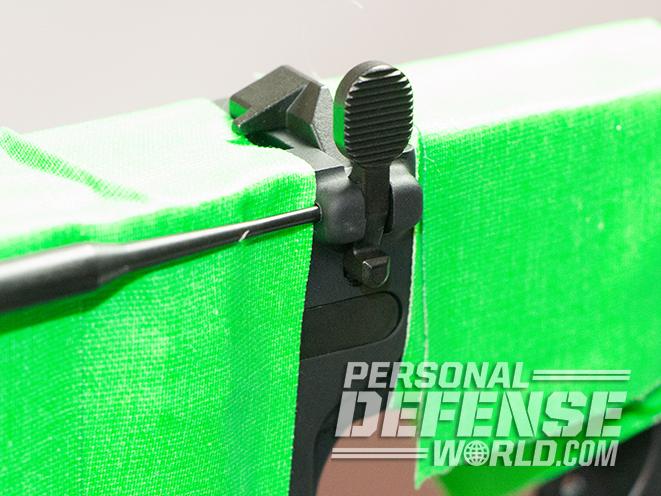
4.) Install The Bolt Catch
Advertisement — Continue Reading Below
You need to find the bolt catch, bolt catch spring, bolt catch buffer and bolt catch roll pin in the lower parts kit. These parts are found in the small blue bag of the Anderson kit.
Return the lower to the vise block and secure it. Place the buffer on top of the spring and slide them into the hole on the left side of the receiver where the bolt catch pivots. Place the bolt catch in its position, being careful to ensure the buffer and spring are behind the lower portion of the catch. Align the pivot hole in the catch with the two holes in the receiver on either side of the catch.
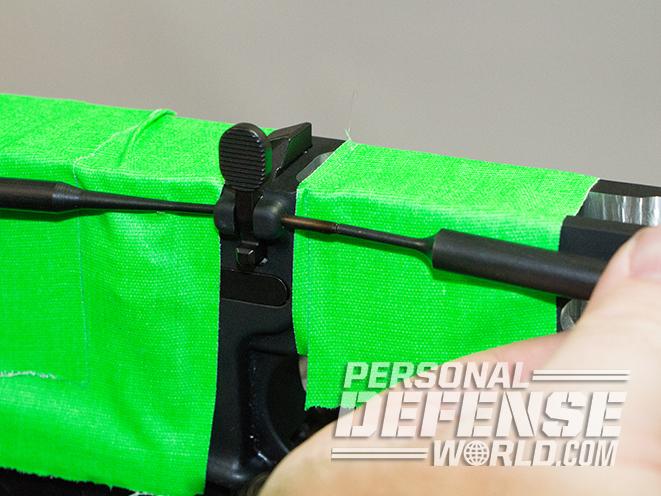
Slide the smallest punch in the Obsidian set through the left side of the pivot holes. This should go in far enough to hold the catch in place and keep it aligned with the holes. Take the roll pin and drive it in from the right side hole using a roll pin punch. As you tap it into place, the small punch holding the assembly together will fall free, allowing you to properly seat the pin. When the pin is seated, the catch should be under spring pressure and move freely. Some polymer lowers use a proprietary bolt catch system. In these cases, refer to the company’s specific instructions.
Advertisement — Continue Reading Below
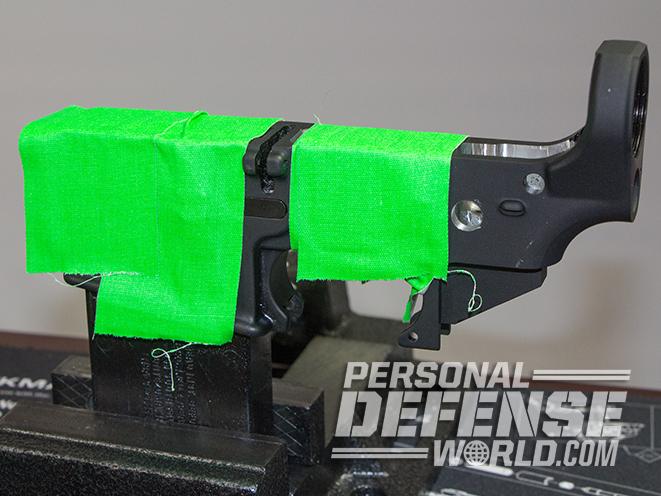
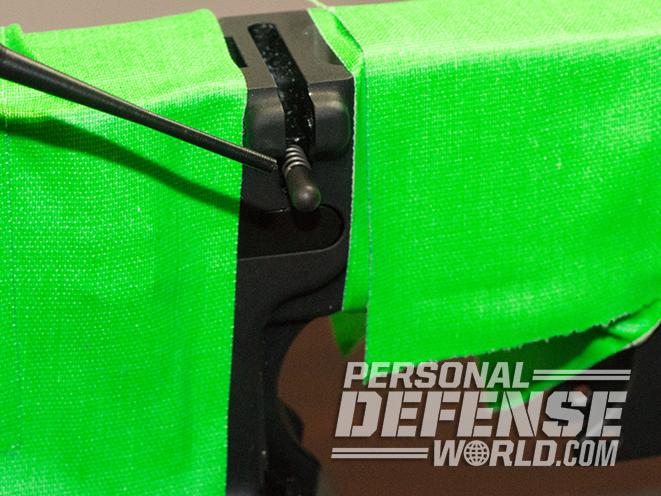
TIP: Apply masking take to the surface of the receiver prior to this step. This will help protect the receiver’s finish from damage when you are tapping the bolt catch roll pin home.
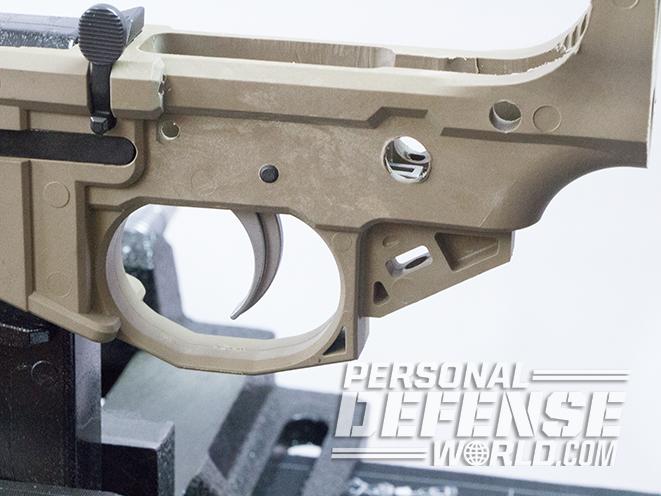
5.) Add The Trigger
Advertisement — Continue Reading Below
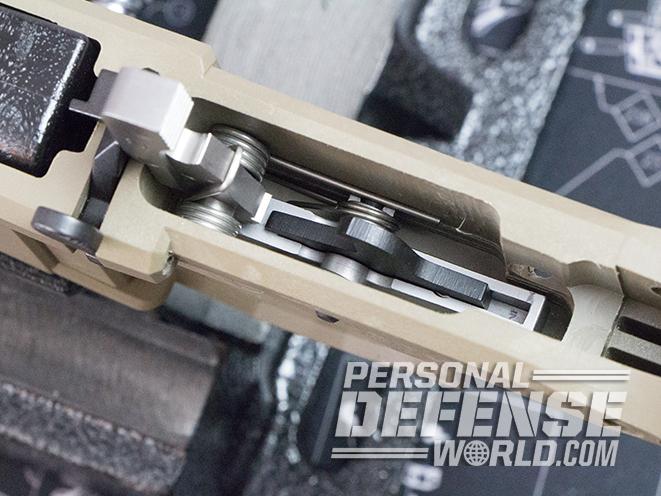
Find all of the parts to the trigger assembly. These are the trigger, hammer, disconnector, trigger pin, hammer pin, disconnector spring, hammer spring and trigger spring. In the Anderson kit, these are all in a clear plastic bag.
The disconnector spring is a small coil spring with one end that is larger than the other. Slip this spring into the rear portion of the trigger with the wider end down against the trigger. There will be friction when seating it, and it should not slip out once it is in place.
Slip the trigger spring over the pivot points on either side of the trigger. When it’s properly placed, the two open legs of the spring should be below the shorter U-shaped section of the trigger spring.
Now place the disconnector on top of the trigger. It should be arranged so that the square notch is to the rear, facing down and resting on top of the dis-connector spring. The pivot hole in the disconnector should align with the pivot holes in the trigger when the disconnector spring is depressed.
Place the trigger assembly in the lower with the trigger properly facing forward. The assembly should be propped up by the legs of the trigger spring. You now need to align the pivot holes of the trigger with the rear fire control pin holes in the receiver. You will need to press down on the trigger, which will place it under spring tension. Slide a punch through the right side of the receiver to maintain alignment of all of the parts.
Start the trigger pin into the hole from the left side. As you slide the pin, you can slide the punch out. You may need to depress the disconnector as the pin slides in and the punch slides out. Once the pin has been pushed all the way through, it should be flush on both sides of the receiver. Make sure the trigger pulls smoothly to the rear and that the disconnector can still be depressed.
Take the hammer spring and place it on the hammer. If you look at the spring, one end has a pair of open legs and the other has a closed “U.” Place the spring onto the hammer so the U-shaped section is on the same side as the back of the hammer and the coiled sections of spring are over the hammer’s pivot points. The spring legs should come off the top of the hammer and extend down.
Insert the hammer into the lower. The face of the hammer should face forward while the back of the hammer, the hooked part, should face to the rear. The legs of the hammer spring should rest on top of the pivot points of the trigger.
Push the hammer into its proper position, aligning its pivot holes with the holes you drilled that are closest to the magazine well. As you push the hammer into the receiver, the spring builds tension, so it will take a bit of effort to get the hammer properly aligned. When it is lined up, slide a punch through the holes to fix the hammer into position.
Take the hammer pin and begin to move it into the receiver from the opposite side of the punch. Lightly tapping with a rubber mallet can help move the pin into place. Be careful to keep everything aligned as the punch is naturally moved from its position. Once the hammer pin is in place, it should be flush on both sides of the receiver.
Function-test the trigger and hammer. Push the hammer back into a cocked position. It should catch and remain there until the trigger is pulled. As you are testing, make sure you do not allow the hammer to slam forward into the receiver body and damage the gun.
6.) Safety & Pistol Grip
The safety selector, spring, detent and pistol grip screw can be found in the red bag of the Anderson kit. Cock the hammer and then slide the safety selector into place from the left side of the frame. With it in the “safe” position, try pulling the hammer. The hammer should not fall. Move the selector to the “fire” position. Now pull the trigger and the hammer should fall. Take care to not let the hammer strike the lower.
Take the lower off of the block and turn it over. Using tape to prevent marring, place the receiver in the vise upside down and tighten it only to the point where it does not wiggle freely. You do not want to apply very much pressure to the receiver regardless of the material used in its construction.
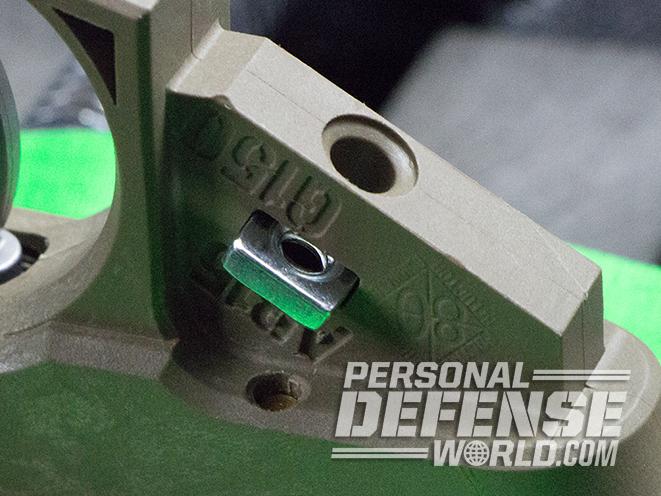
On the receiver, there are two holes where the grip will go: a large hole along the centerline of the receiver, and a small hole set off to one side. Place the detent, point end down, into the small hole. Take the pistol grip and put the spring in the small hole on it that corresponds to the small hole on the receiver.
Carefully place the pistol grip onto the receiver, making sure the spring aligns with the detent. Press the pistol grip down and into position. Screw in the pistol grip screw.
Some polymer lowers require a slightly different action to attach the pistol grip. The Polymer80 lower I used has a small nut that is inserted into the lower prior to placing the pistol grip. A screw that matches the nut was provided in the Polymer80 kit I purchased.
Once the grip is secure, remove the receiver from the vise and check to ensure the safety is working properly.
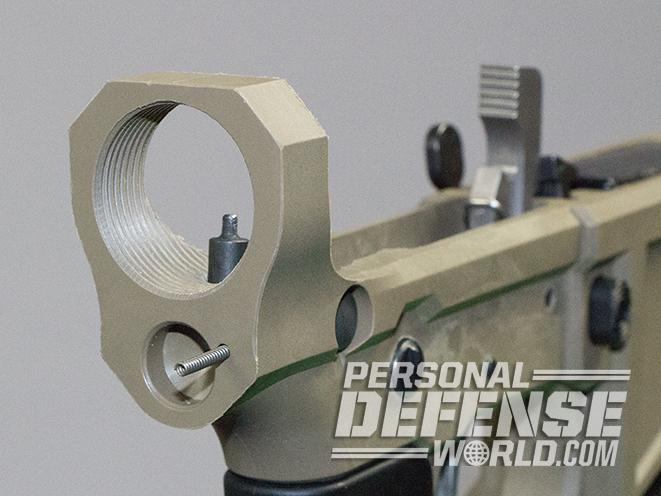
7.) Buffer Tube & Stock
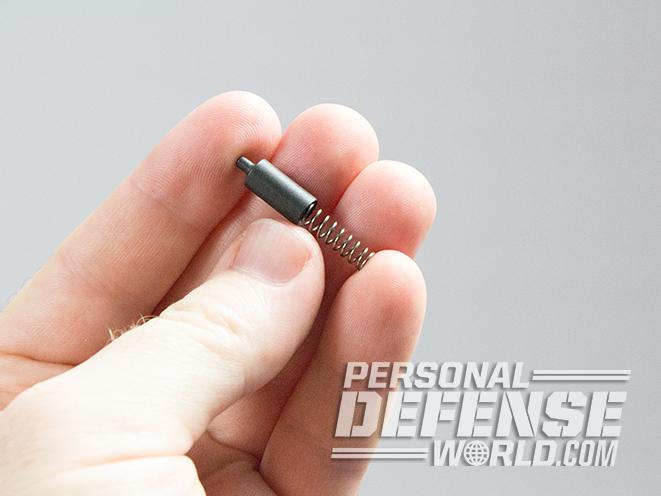
In this step, you’ll use the balance of the parts from the kit and complete the build. Insert the takedown pin into the pre-drilled hole at the rear of the lower. Turn it so the trenched area faces toward the rear of the receiver. Then place the takedown detent and takedown detent spring into the small hole at the rear of the receiver. The spring will stick out from the hole.
Place the buffer retainer onto the buffer retainer spring. Place the spring and retainer into the hole at the back of the receiver where the buffer tube screws into the lower.
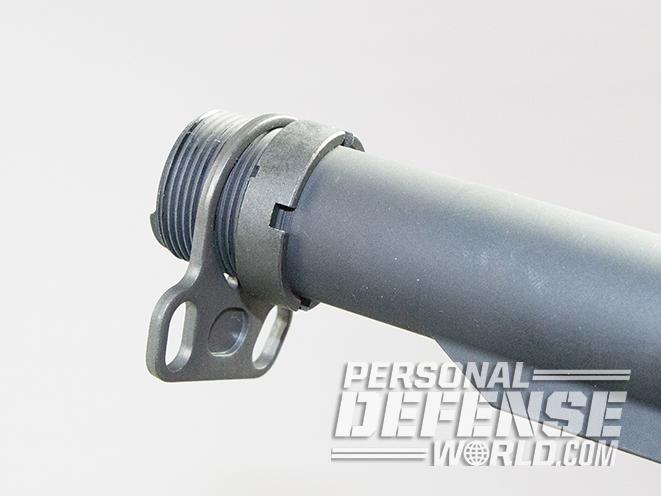
Thread the castle nut onto the buffer tube. Slide the receiver end plate onto the buffer tube. The Anderson kit uses an end plate that has a single-point sling attachment on each side, saving you from purchasing one separately.
Slowly thread the buffer tube into the lower receiver. Be careful to prevent cross-threading, and make sure you do not damage the exposed takedown detent spring. As you get close to the spring, you can press it into the lower with a flat blade or simply hold the end plate against it while you continue to screw the buffer tube in.
When the buffer tube reaches the buffer retainer, press it down and continue to thread the buffer in so that the edge of the tube keeps the retainer compressed. The tip of the retainer should protrude above the tube edge.
Make sure the end plate is pressed firmly against the receiver. Hand-tighten the castle nut to the back of the end plate. Using an AR stock wrench, tighten the castle nut. I use a Brownells AR-15 armorer’s wrench that allows for the use of a torque wrench for precise tightening of the buffer tube.
You can now add the stock. With most adjustable stocks, there is a lever for changing the length of pull. Many of these stocks allow you to pull the lever down to slide the stock onto the buffer tube. In this build, I used the EX Performance stock from Adaptive Tactical. This stock has a soft recoil pad, a QD sling-attachment point and a protected adjustment lever. By simply pulling down on the tabs above the lever, I was able to easily slip the stock onto the gun.
8.) Complete The Rifle
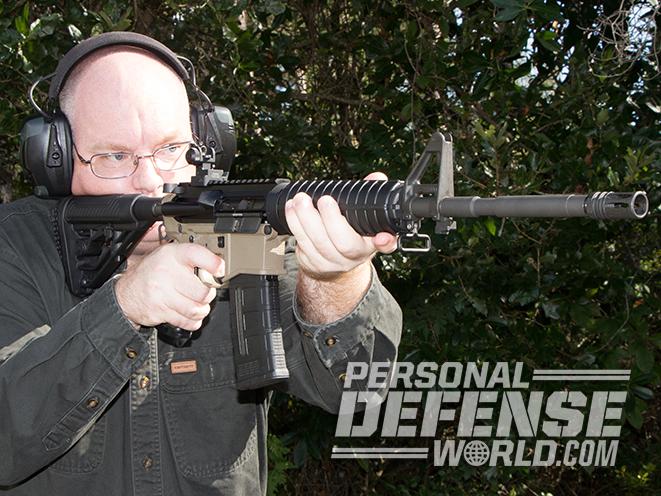
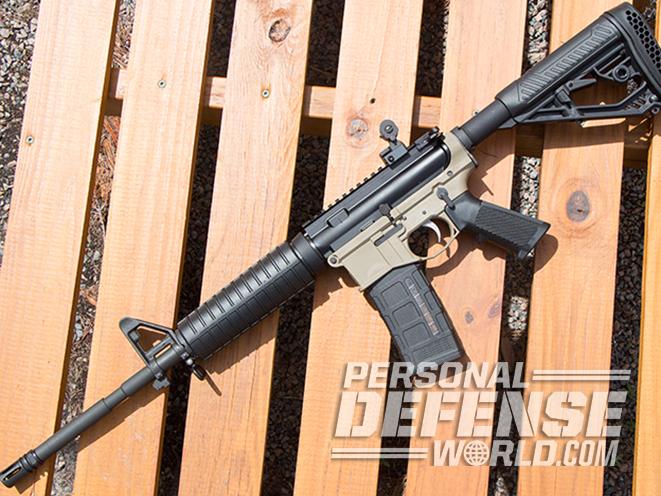
The lower is now complete. Simply add an assembled upper, complete a round of function tests and head to the range.
For More Information
Anderson Manufacturing
andersonrifles.com
Brownells
brownells.com; 800-741-0015
Obsidian Arms
obsidianarms.com
Polymer80
polymer80.com; 800-517-1243
For more from author Richard Johnson, visit http://www.
This article was originally published in ‘Gun Buyer’s Annual’ 2017. To subscribe, visit outdoorgroupstore.com.