
When it comes to using tools, poor habits can be more than just a nuisance—they can be downright dangerous. It only takes one split second for an “oh crap” moment to derail your project or even cause serious injury. Ouch!
Recognizing bad tool habits before they lead to life-changing accidents or ruin your day is key. Let’s focus on breaking those bad tool habits and staying safe while getting the job done!
Cut Away From Yourself
Here is a simple rule for cutting tools: cut away from any body parts. Is it simple? It’s really not. One of the most common bad tool habits with a knife is cutting towards oneself or others. This is a huge no-no!
In particular, wood carving techniques involve holding the project (wood) against your chest and using your knife to carve towards you at a distance, using the wrist and palm as a stopper before allowing the blade to come close. Again, this is not basic. It’s an advanced carving technique beyond this article’s scope. Basics first!
Always make a valiant effort to cut away from body parts, grip work, and food so your fingers are safe. The following bad habits will spotlight these safety don’ts and offer better alternatives!
Back-Up Your Work
In the kitchen and the woods, back up your work. Remember when the teacher told you to show your work in math class? In the school of the woods, back up your work! Use a solid, stable, safe platform to cut and split. Why? This method will give you the best energy transfer and ensure your tool isn’t getting dinged up by rocks or your foot and shin bones!
We use a cutting board made from plastic or wood in the kitchen. Whether we are slicing veggies or meat, we must have safety in mind. Safety in the kitchen means having a sharp knife or cleaver and using proper techniques to keep our digits intact. We must use various basic methods to ensure the food we’re processing is cut correctly. Enter—the claw!
Bend your fingers on your support hand, in like a tiger claw. The chef’s claw is a hand position used for safe and efficient chopping. To form the claw, bend your fingers inward, creating a protective grip with your fingertips pointing downward. This grip keeps your fingers curled and away from the blade. The claw enhances your grip stability and reduces the risk of accidental cuts, allowing for smoother and safer slicing and chopping movements.
Gripping food in a Pac-Man grip is the best, most assured way to slice your finger—or two. Use the claw, and keep your digits!
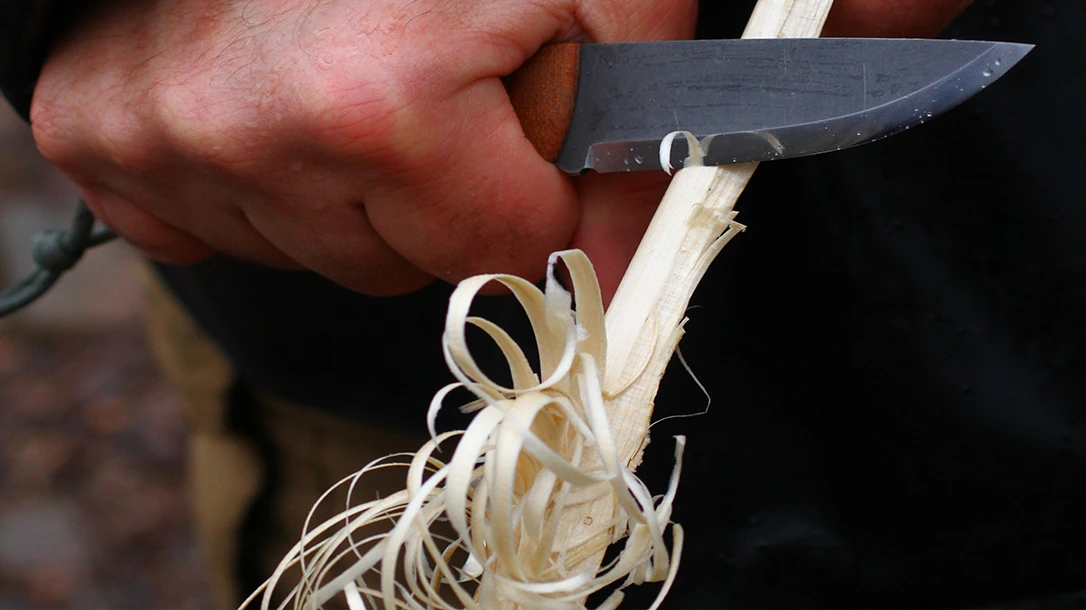
Thumb on Spine
As a wilderness and jungle survival instructor, I see this bad habit the most. It seems innate for people to hold a knife tightly and add their thumb to the spine for added power, grip, or whatever. Several knives come standard with jimping on the lower section of the spine. This feature makes people feel they need to put their thumb there. Why? Don’t!
Bad tool habits always come to light in a class on wilderness skills. People proudly assert that their thumb in that position allows them to make the thickest slivers of wood. Thick and ungodly, they’ll never catch a spark from a Ferro rod. They’ll be kindling at best!
Break the Cycle
Use a fist grip when back to basics with a fixed blade or folding knife. Fingers wrapped around the handle and thumb in the position of a fist meant to punch. This grip is also called a forward grip—the same thing. The first grip is a powerful one. It will give you control, so no thumb is needed. Use this grip similar to a slow Superman punch, down and away from yourself. An extended or bent locked arm position makes this method super effective!
Feather sticks are essential for making a fire with natural materials and creating reliable tinder and kindling. You need a sharp knife. Forget the grind type. However, there’s one grip that fails mostly at this task. The dreaded thumb on the spine is the one bad tool habit that is the reason your feathers do not stay on the stick. I promise you!
Holding the knife in your dominant hand, use the fist grip to make your curls. The softer and straighter-grained wood works best. Look for a section of the wood that’s straight at the bottom or slightly curved up. Start slicing at the sharp corners, slightly rotating the stick to cut into the fresh, newly formed corners. Ensure you aren’t digging into the wood too aggressively or at too steep an angle. This task takes practice, so put the time in!
Pro Tip: Slightly angling the knife blade will give you better curls.
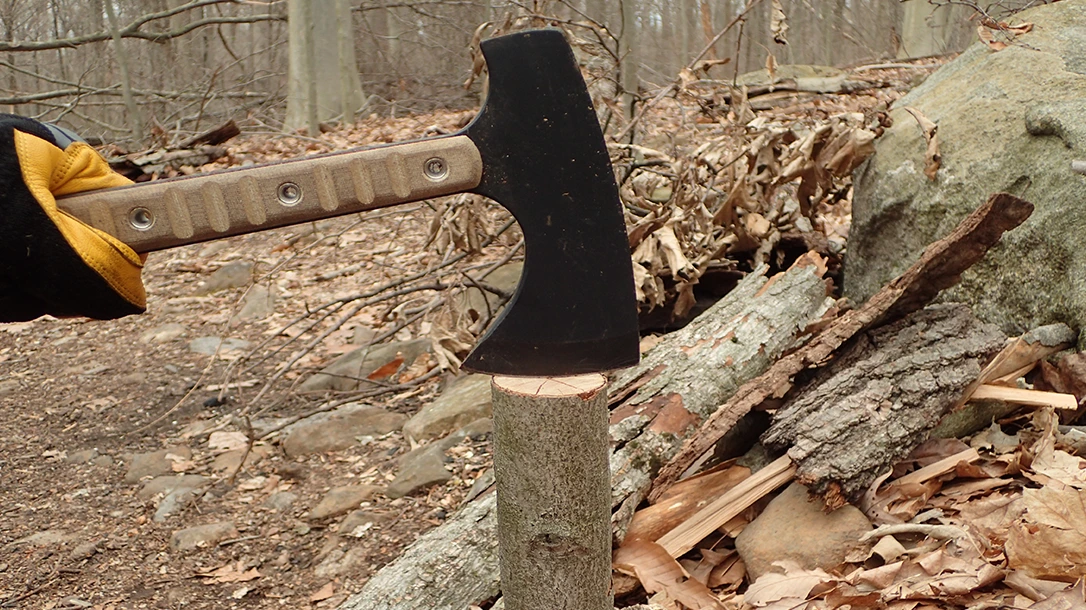
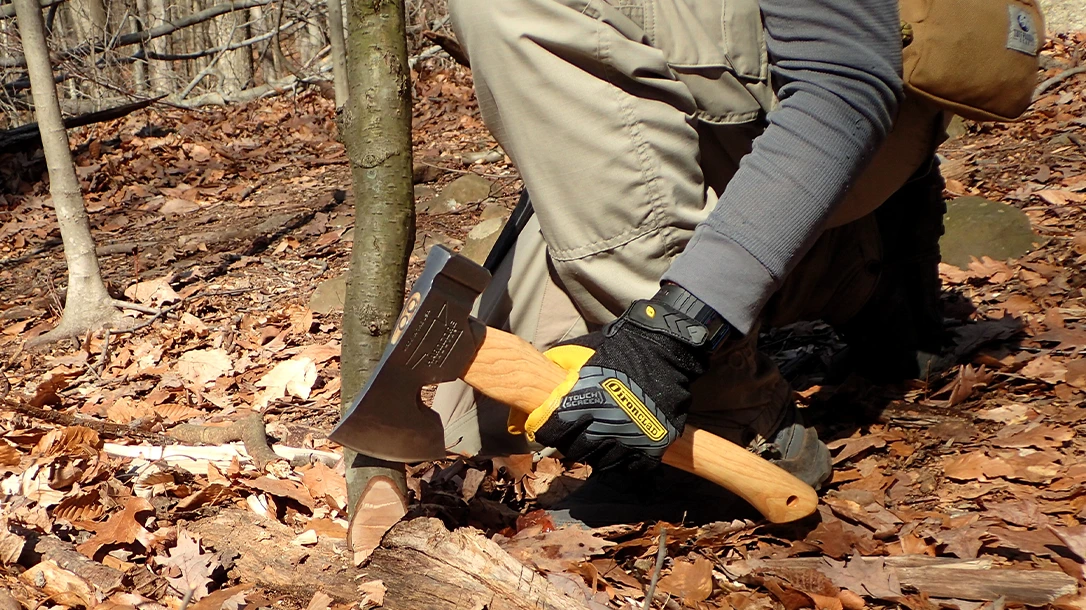
Chopping Block
Using a wooden backing takes us back to the above section of backing up your work. This section is about chopping tools and knife use. Backing up your work is vital for the safety and longevity of your tools and body parts.
We may all be guilty of using an axe or a chopping blade to chop a stick lying directly on the ground, backed up by dirt and unseen stones, or worse—a chopping rock. I’ve seen this too much, the worst being students using a large rock to baton a knife through wood. Usually, they use another rock as a baton. Cringe-worthy!
A heavy-duty wooden log cut to have a flat working surface is ideal. A log lying horizontally works, too, if you can create a stable environment to prevent those bad tool habits from causing accidents. Stay safe and keep practicing!


